Be it the much-loved flatlays, or the lifestyle and upright shots, I love how my blog gives me a platform upon which to be more creative. I like to think that after three years of blogging and taking photos, I’m getting better; I can certainly see the differences.
The technical elements used to overwhelm me and I’ve still to master the manual mode on my DSLR. But over time I’ve learnt to trust my own judgment as generally, what looks aesthetically pleasing to me, also goes down well with my viewers.
With a heap of patience, a good dose of experimenting and a little bit of technique, I’ve not only become more creative with my photography, but relaxed about it too. I no longer chase after one type of aesthetic. Likewise, I don’t worry if the lighting isn’t perfect. In fact, I find you can play to those less than optimal lighting conditions to create that more moody and sultry shot.
Whilst I’m a firm believer in perfecting your craft, I like to change things up every so often too. Being more creative with my photos keeps me motivated and inspired and I hope, keeps my followers interested too.
Over time I’ve learnt that it’s actually the subtlest of changes that have made the most difference to my photos and I’m sharing some of these with you today. Most of these tips relate to lifestyle and upright shots. I will touch briefly on flatlays but there’s some more extensive advice on flatlays in my earlier posts on How to Create the Perfect Flatlay and My Favourite Flatlay Styles.
So, without further ado, let’s get creative….
Change Your Location
For so long I was fixated with taking my photos in one room, using the same set up and where I felt that the lighting was best. Now technically there’s nothing wrong with that since having the right lighting conditions means half the battle is won. However, little did I know that some great shooting locations were right under my nose all that time.
By not thinking outside the box I was actually missing the obvious and it’s only recently that I realised we’ve got some gorgeous window sills in the house that make for a great photography backdrop. Likewise, the back of our house is quite dark so I always stayed clear when it came to photo sessions. However, it actually works perfectly for those moody shots like the two below.
I now always make it a point to scan the house for inspiration and I don’t shy away from a slightly dark room or backdrop but choose to just work with it. Also, I love to shoot outdoors and this creates a whole other vibe to my photos.


Move Your Camera
Aside from finding different places to take your photos, move your camera too. From tilting the camera angle, to kneeling on the floor, it’s often the awkward angles that result in that perfect shot. I’m one to take several shots at varying positions and angles and since I use a 50mm fixed lens, this automatically forces me to be more creative with my composition as the only way to zoom in and out is to move. The shot below involved my products on the bed. I, on the other hand, was kneeling on the floor – the focus being the pot but with my camera tilted slightly upwards.
When you change your position you’ll notice that you can also be more creative with your depth of field i.e. the distance between the closest and farthest objects that appear acceptably sharp. The example below would be described as a narrow depth of field but you can play around with that transition between sharp and unsharp by changing the distance between your lens and the focal point as well as your aperture, which I’ll touch on more below.

Embrace That Blur
That soft, out of focus effect is highly desirable and by far my favourite style. Take it a step further and you may even get that stunning bokeh effect where bright out of focus pinpoints become halos such as in the example below.
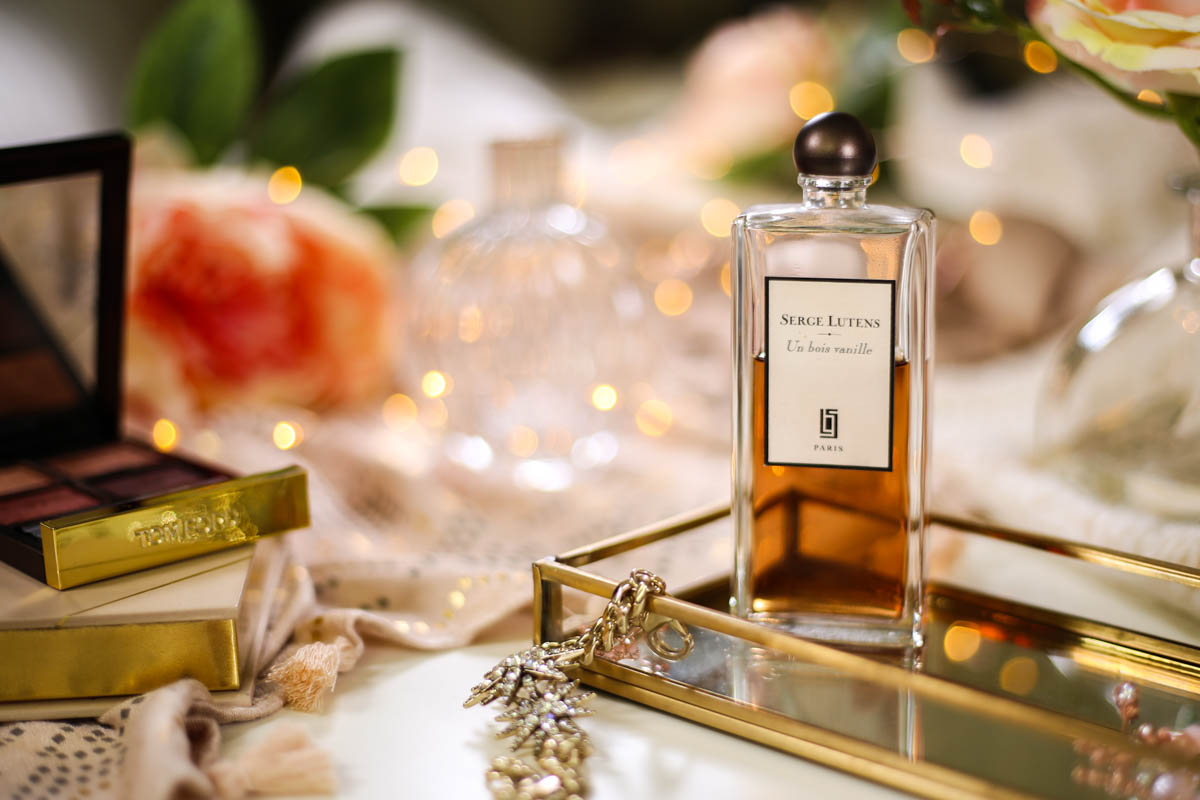
My preferred method to get that perfect blur and/or bokeh effect is to keep distance between my object and the background. In the photo below, the perfume bottle is my focal point and I’ve placed it pretty much at the front edge of the table. The background, i.e. my other props, are towards the end. When I shoot, however, I shoot as close as I can possibly get towards the focal point, which together with a lower f/stop number (wider aperture), will blur out the background. I often shoot with an f/stop between 1.8 and 2.2.
Again, if you try different angles you’ll notice how much or how little blurs and I generally keep taking shots until I’m happy. However, as much as the background may get blurred out, you do still need to be mindful of colours and props as heavy and large objects in the background can end up looking like a heavy block of colour. Unless that’s the look you are going for, I suggest a number of varied props and things like vases, flowers and books with a good placement of complimentary colours work well. And if you really want to get that halo effect, some fairy lights in the background always helps.
Create That Soft-Focus Effect In Flatlays
Although flatlays are largely about crisp, clear images with everything in focus, that intentional blurry and out of focus effect can work wonders too. In fact, I prefer it because it’s not your typical flatlay and makes it look unique. See below for two examples:

The trick is to pick your focal point and then create height with your props and overlap items slightly.
You then need to shoot quite close to your focal point to get that blur. In this example, the Dior Highlighter is the focal point with the overlapping flowers slightly blurred out.

However, in this example, I’ve kept the roses in focus. Note how the roses are placed at a height and again slightly overlapping the book in the background.
Also, when it comes to flatlays I don’t think a full on blur would work as it can look too hazy. Rather, you should be able to make out the props, even if they are a bit blurry, so it still looks like a flatlay.
These are my favourite types of shots as they look more artistic and you can embrace any flaws too. You can of course play further with your camera settings to achieve your desired aesthetic but I find product placement with a low f/stop number usually does the trick.
The beauty about being creative is that there aren’t really any rules. Rather, break them, do something outside the norm and, if you are anything like me, keep clicking until you are happy. I hope you found this useful and I would love to hear your thoughts and whether you will be trying any of these tips. x